Pages

Friday, August 30, 2013

Peanut Butter, Banana Oatmeal Bites

I had some left over bananas that I didn't use in the banana bread yesterday that I really wanted to use before the weekend. I remember coming across a recipe where you mix ripe bananas and rolled oats....I couldn't remember exactly and was too lazy to look it up so I just went with it and they ended up turning out! I like these because they are healthy (no butter or added sugar, well besides the few chocolate chips I added to the top of some them haha) but they have the texture of a cookie and will satisfy my never ending craving for sweets! 

2 over ripe bananas, mashed
1/2 cup peanut butter
1/2 cup applesauce
2 cups rolled oats
2 TBL honey
Chocolate chips (optional)

Mix all ingredients together and spoon into a muffin tin, bake at 350 for 8-10 and allow to cool before removing/eating. 

You can spoon these onto a cookie sheet too if you prefer smaller "bites". These are perfect to grab for on the go breakfast or to eat after dinner without ruining your diet :) I added some chocolate chips to mine but in the past I've added other yummy toppers like dried cranberries, nuts, extra peanut butter, butterscotch chips...the possibilities are endless! Enjoy :)


Zucchini Banana Bread

I had some zucchinis and over ripe bananas that I needed to use and decided that this bread would be a yummy breakfast for the gathering at the lake this weekend. It is fairly healthy and sweet enough to be eaten as a dessert too if you'd like :-)

I use my food processor to shred the zucchini which is quick and easy, but if you don't have a food processor you can use a regular cheese grater.

Start by shredding your zucchini; you can leave the skins on or off. I left mine on because #1 I am lazy and #2 I like the way it looks in the bread. Put your shredded zucchini into a fine mesh rand squeeze out as much moisture as you can.

Zucchini Banana Bread
Makes 1 9×5 loaf
1 medium zucchini, shredded, moisture squeezed out
1 1/4 cup flour
1 teaspoon baking soda
1/2 teaspoon cinnamon
pinch of freshly grated nutmeg
1/2 teaspoon salt
3/4 to 1 c sugar (depending on how sweet you like your bread)
2 eggs
1/2 cup canola oil
1 large or 2 small overripe bananas, mashed
1 teaspoon vanilla extract
Preheat oven to 350.  Grease a 9×5 loaf pan and line with parchment paper.  In a medium bowl, whisk flour and baking soda, nutmeg, cinnamon and salt.  In another bowl, combine sugar, eggs and oil and beat on high speed with a handheld until creamy and light.  Mix in mashed bananas and vanilla and beat until combined.  Stir in dry ingredients until incorporated and then stir in zucchini.  Pour batter into pan and bake for about one hour.

 I doubled this recipe to make two loaves because I had two zucchini and lots of bananas.
**I found this recipe on Pinterest but it was originally pinned from here.

Due to the moisture of the zucchini and the bananas, this is an incredibly dense bread; do not expect a light and fluffy result as you will be disappointed.

So so tasty and something you won't feel terrible about enjoying :-)


Chicken Biscuit Pot Pie


Nothing says "comfort food" quite like chicken pot pie! I've never been a big fan of the pie crust, so I turn mine into a casserole and put home made biscuits on top. This is such a yummy dish, and it's simple too! This will definitely impress anybody you serve it too- it's one of our favorites! It's especially yummy and comforting in the winter; warms your insides and makes you want to take a nap! 
Chicken biscuit pot pie: 
1. You're going to start by making a simple chicken gravy: melt 3 Tablespoons of butter over medium heat. Add 3 Tablespoons of flour and whisk until combined. Cook over medium heat for about 2-3 minutes just to cook the raw taste out of the flour. This is the start to your gravy, it's call a roux.
** at this point you also need to boil your veggies. I just use frozen mixed veggies; put them in a small sauce pan and cover with water. Bring to a boil and cook for 3-5 mins**
2. Whisk in 1 and 1/2 cups chicken broth and 1/2 cup milk, keep whisking until the gravy thickens.
3, time to spice it up! Add 1/2 teaspoons of each of the following:
Seasoning salt
Garlic salt 
Dry mustard powder
Parsley flakes 
Black pepper
& 1/4 teaspoons paprika 

4.  Add in your vegetables and cooked chicken (I pulled the meat off of a store bought pre-cooked rotisserie chicken) 
Let this summer over LOW heat while you make the biscuits. 

2 cups sifted flour
3 teaspoons baking soda 
6 tablespoons shortening
1 teaspoon salt
2/3 cup cold milk 

* I used my food processor for this recipe*
1. Combine flour, baking soda and salt.
2. Cut in shortening until mixture resembles coarse meal. 
3. Add milk to make a soft dough
4. Turn out into floured surface and knead gently for 30 seconds.
5. Roll out 3/4" to 1/2" thickness and cut desired size.

Pour the chicken filling into a greased glass pan and top with the biscuits. 

Brush the top with melted butter and cook in a 425 degree oven for about 15 minutes.

If you want to take a short cut, you can use the refrigerated pop and cook biscuits instead. It makes this recipe easier and quicker! I've used the refrigerated kind a few times and it is still tasty!

Scoop yourself out some of this bubbly hot deliciousness! It goes fast! 
Yum yum yum!!! 

I also had some left over biscuit dough so I just cooked those separately and ate them with raspberry jam this morning for breakfast which was also way yummy! 
Enjoy!! 

Thursday, August 29, 2013

Chipolte Lime Chicken Tacos with Cowboy Caviar

Mexican is one of my most favorite cuisines! I am better at eating it than I am at making it; but I continue to make it so that I can continue to eat it. I LOVE going out to a good Mexican restaurant and eating delicious authentic Mexican food, and this also inspires me to experiment cooking this type of food.
Tacos are a regular on the menu for our week night dinners but last night I wanted to change it up from the boring tacos from a packet of seasoning, so I added some yummy extras to the tacos and made them a little more exciting. They were good! and the Cowboy Caviar is such a great side/topper/dip (however you wanna eat it, the stuff is GOOD).

I'm going to start with the recipe for the Cowboy Caviar because I recommend making this in advance so it has a chance to sit and marinade or whatever. It's just better after it's been sitting in the fridge for awhile, trust me! It can be used as a little appetizer with chips while you wait for the tacos and you can put it on the tacos too :-)

Cowboy Caviar
1 can black eyed peas (drained and rinsed)
1 can black beans (drained and rinsed)
1 can sweet corn (drained and rinsed)
1 can diced tomatoes
1/2 cup diced purple or green onions
2 avocados (diced)
1 jalapeno pepper (optional)
cilantro(optional)
1/2 cup Italian Dressing
Juice of 1 lime
garlic salt and black pepper to taste

Dump this all in a bowl and mix! Easy and sooooo delicious!


Now for the Tacos....
1. Start with two boneless, skinless chicken breast (or more if you're feeding more people; this was by far enough for Scott and I, plus we had leftovers)
2. Roast the chicken breasts in the oven until they're done (375 degrees for about 20 minutes, depending on your oven)
3. Let the chicken breasts cool while you start working on the sauce.
4. Start with 2 Tablespoons of oil in a big pan.
5. Add 1/4 cup of purple onions or shallots to the hot oil and cook until the onions become soft and transparent.
6. Add 2 tablespoons minced garlic and continue to cook until the garlic is fragrant.

7. At this point, add the juice of 1/2 of a lime, 2-4 teaspoons of cumin, 1/2 packet store bought chicken taco seasoning, and 1-2 teaspoons of finely minced or ground *chipotle pepper* (I purchased whole chipotle peppers in adobo sauce and put one of them and some sauce in my food processor and ground it into a paste).
8. Add in 1/2 can of diced tomatoes with juice.
9. Cover the pan and let the sauce simmer for 15 minutes, it will thicken up quite a bit.
10. Add 1/4 to1/2 cup of chicken broth to thin out the sauce.
11. Dice or shred the cooked, cooled chicken and add it to the sauce.


  12. Stir and place the lid on the pan and let simmer for 5 more minutes.


Dress up your tacos however you like. I used small corn tortillas warmed in a dry pan, Scott used burrito sized flour tortillas, or you can use hard shell.
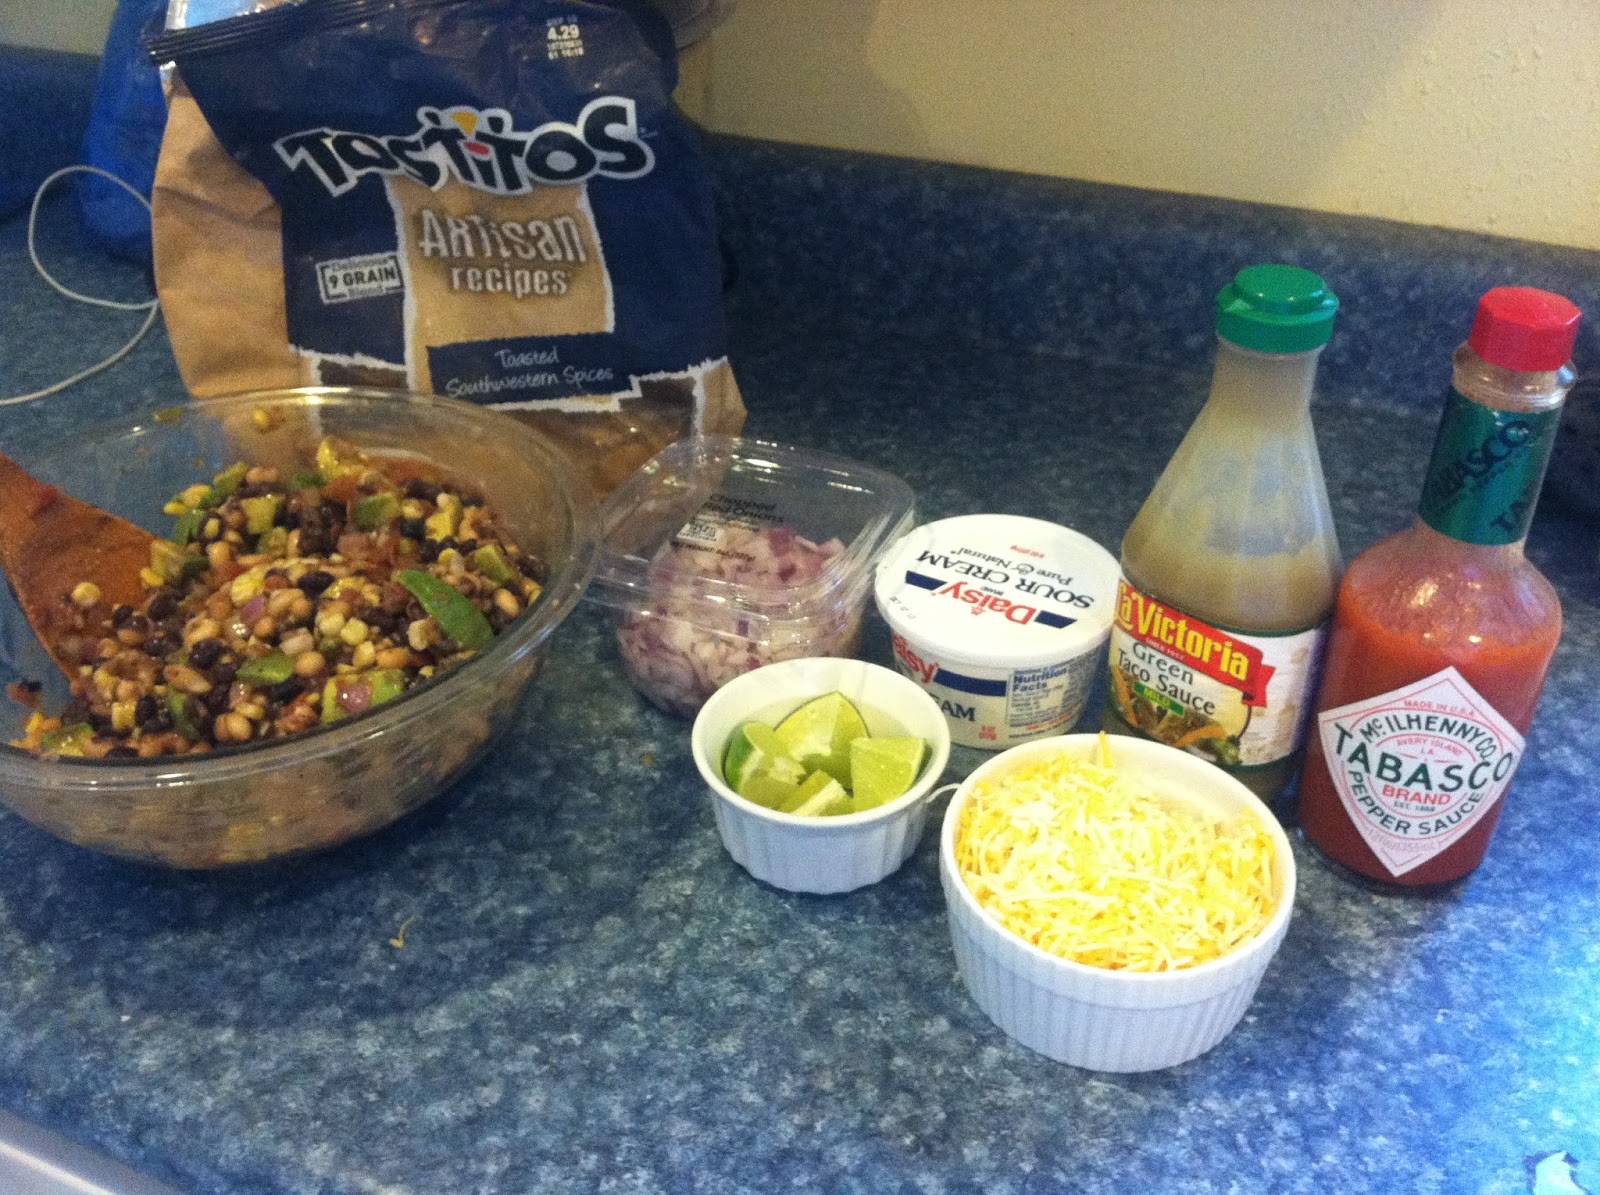
This is our taco spread! I topped mine with shredded cheese, more purple onion Knorr Mexican Rice, green taco sauce and some of the cowboy caviar. 
Scott gets a little more fancy with his... "Now this is a taco, this is what you should take a picture of!" I believe those were his exact words. He thought this should be documented.

Hope you enjoy as much as I did! YUM!


Wednesday, August 28, 2013

Home Made Playdoh!

I figure all of you are bright enough to figure out but here is my little disclaimer: THIS IS NOT TO EAT! Well, you could eat it but it would taste really gross and that's not what it's made for. It's made for your children to smear all over the table, cut out shapes, mix together, make a mess and probably (if you're as lucky as me) mush into the carpet. Even though this isn't a recipe for food, its too fun not to share :-) I found this recipe here, and the only thing I did differently was split it up into 5 smaller batches for different colors instead of make one big batch of one color.


Griffinn and I had so much fun with this! He picked out the colors he wanted and helped me mix it all together; then of course he busted out his playdoh accessories and played with it for about an hour!

Ingredients:
1/2 cup of salf
1 cup flour
2 tablespoons Cream of Tartar
1 cup of water
1 tablespoon of oil
Food Coloring (I used Wilton Icing Colors)

Directions:
1. Mix all ingredients together in a medium sized sauce pan
2. Stir over medium heat until dough is pliable
3. Allow to cool and store in a sealed container

This is where I skipped the food coloring step and let the plain white dough cool before I separated it into smaller batches and added the food coloring then.
You can totally just add the food coloring into the pan and make one color though...its probably a lot easier but not near as much fun!

This playdoh is wayyyyy better than the kind you buy at the store; its a lot softer, easier to play with and lasts way longer too!
I'm sure you can buy cute little plastic containers to keep this in but I just used snack sized ziploc baggies.
Have fun!


Most Common Cooking Mistakes

Good Morning! I thought I'd start the day by sharing this article I discovered last night :-) 
 I am totally guilty of some of these mishaps myself....but it's nice to know what you need to implement and/or remove from your cooking routine in order to make it as successful as possible!
 Thanks for reading!

Tuesday, August 27, 2013

Chocolate Brownies with Peanut Butter Icing

Fourth blog post today and the general consensus: we eat a lot! Haha you never really notice how much you eat until you start documenting it...holy moly! Good thing we are starting the Insanity Program soon or this blog may have to take a turn for the healthy...dundundun! No- I have nothing against healthy food. I just like food that tastes yummy (who doesn't?) and generally don't cut any corners and sacrifice taste for calories. Oh well. You will probably see one or two "healthy" recipes posted sooner or later...but if that's solely what you're searching for; I'm sorry but you're barkin' up the wrong tree my friends!

I have a MAJOR dessert problem. Seriously I almost make dessert every night. And tonight, since I didn't make anything fancy for dinner...Kraft Mac 'n' Cheese and sandwiches. Whoopdee-Doo, right? I knew I had to satisfy my urge to bake as well as my urge to eat something deliciously sweet with these yummy brownies! The original recipe is from All Recipes with chocolate icing, but peanut butter sounded wayyyy better so I made up my own peanut butter icing to go with! YUM.

Brownies:

1/2 cup butter 
1 cup white sugar
 2 eggs
1 teaspoon vanilla extract
1/3 cup unsweetened cocoa powder
1/2 cup all-purpose flour
1/4 teaspoon salt
1/4 teaspoon baking powder

1. Preheat oven to 350 degrees F (175 degrees C). Grease and flour an 8 inch square pan.
2. In a large saucepan, melt 1/2 cup butter. Remove from heat, and stir in sugar, eggs, and 1 teaspoon vanilla. Beat in 1/3 cup cocoa, 1/2 cup flour, salt, and baking powder. 
3. Spread batter into prepared pan. Bake in preheated oven for 25 to 30 minutes. Do not overcook.

I was reading the comments for this recipe, and the main thing I saw people were saying was to beat these brownies by hand. Now people, one of my most prized possessions is my beautiful kitchen aid mixer! I hate to watch that $400 machine sit there and go to waste while I use a wooden spoon. BUT, every comment said that the brownies turned out more fudge-y instead of cake-y when done this way. I prefer a brownie with a fudge texture rather than cake like so I followed these recommendations. My poor kitchen aid baby!

For the frosting, I melted 3 tablespoons of butter and 1/2 cup of peanut butter in a small sauce pan. When the two butters were completely melted I poured the mixture over 1 cup of confectioners sugar, and stirred until combined. At this point I added I teaspoon of vanilla extract, and 1-2 tablespoons of milk to thin the frosting out to a consistency that it could be poured over the brownies.


I poured the icing over the top while the brownies were still pretty hot, mostly because I couldn't contain myself; but you might want to let the brownies cool off a little more before you lay on the peanut butter deliciousness.
I then stuck the pan into the refrigerator, 'cause I wanted to speed up the process of me cutting into these yummy looking brownies! Didn't last long and I cut into them while they were still gooey, which is why the picture isn't all that beautiful. But for the record, what they lack in beauty they make up for in taste! Holy moly these are sooooooo sweet, delectable, rich, and the perfect combination of chocolate and peanut butter! MMMMMMM!
Yesss this brownie is only about as big as my fork, so word to the wise, these suckers are RICH! Don't over indulge and give yourself a tummy ache! 
They are an ooey-gooey ugly mess but I promise you they will satisfy your sweet tooth in a hurry!


30 Minute Soft Pretzels


I know, I know. 3 posts in one day. Can you tell I'm a little excited about this? I'm sure I'll stop posting 3x a day when the excitement from how FUN this is wears off! Or maybe I won't....

Griffinn and I wanted to try something a little different for lunch today, so I thought we'd try these pretzels. Griff LOVES the ones from the mall so I knew it would be something my picky little eater would like.
 I found this recipe on Pinterest but it was originally pinned from this blog.

This really was pretty simple! I have never made homemade pretzels, and it's probably because every recipe I ever found seemed difficult and time consuming; this one is not! Also, if you have a little 4 year old who likes to help Momma cook like I do, this recipe is even better!


  This recipe calls for sea salt; and I didn't have any in my cupboard so instead I brushed the cooked pretzels with melted butter and sprinkled with regular table salt. It wasn't perfect but sufficed for the salty flavor we were searching for. You can make a cheese dipping sauce for these yummy pretzels, dip them in pizza sauce, or dip them in mustard....whatever you fancy :-) You can also try different variations of the actual pretzel, for example: Parmesan, garlic, cheese, etc. Play with the recipe until you find something you love!


Yields: 8-10 Pretzels

Ingredients

1 1/2 cups luke warm water
1 packet of highly active yeast (I used Red Star Instant Yeast)
1 teaspoon salt
1 tablespoon sugar
4 cups all purpose flour
1 large egg
course sea salt

Directions

-  Preheat the oven to 425 degrees and line a cookie sheet with parchment paper.
-  In a large bowl, pour in the warm water and yeast, stir with a spoon until the yeast is dissolved, about 1 minute. Add in the salt and sugar and stir until incorporated.
-  Slowly add in the flour about 1 cup at a time, mix with a wooden spoon until it gets sticky, continue to add in all your flour and at this point is when I started to use my hands to finish mixing the dough. The dough should no longer be sticky.
-  Knead the dough for about 5 minutes on a lightly floured surface, once kneaded, shape into a ball, with a knife or your hands separate the dough into about 1/3 cup sections, or use smaller or bigger sections depending on how large you want your pretzels.


AND for those of you with a sweet tooth:
 If this is wrong then I don't wanna be right. I left a couple of my pretzels un-buttered and un-salted and turned it into a little dessert by slathering it in this cinnamon/sugar buttery spread.....YUM!! can't say for sure but this might be better than the salted version!