Pages

Monday, October 21, 2013

Bacon Wrapped, Sausage Stuffed, Jalapeno Poppers

These are actually called Atomic Buffalo Turds! Hahahahah and apparently I am five years old because I can't say that without cracking up. I forgot that's what these were originally called until I went back to the website for the recipe just now. Anyways- want to be the person who brings the best hors d'oeuvres to your next party? Then make these, and thank me later when everybody is ooh-ing & ahh-ing over how friggin delicious these things are.
I usually make these before in the oven, but Scott bought himself a late birthday present this weekend; a Traeger Smoker and we wanted to try it out ASAP.

Ingredients
 
10 jalapeno peppers
10 bacon slices, cut in half
10 mini sausages or smokies (I used kilbasa sausage cut into pieces)
8 oz. cream cheese
1 cup grated monterey jack
1 tsp chile powder
1 tsp garlic salt
2 shallots, minced
*I also used mini bell peppers for those who prefer a not-so-spicy version*

Instructions
  1. Slice the jalapenos lengthwise. Using a spoon, remove the seeds and membrane. If using bell peppers, quarter them after they are seeded.
  2. Mix the cream cheese, monterey jack, chile powder, garlic salt and minced shallots. Fill the hollowed out portion of the peppers with the cheese mixture.
  3. Place the sausage on top of the cream cheese. Wrap the half slice of bacon around the jalapeno. If the bacon is not staying tightly wrapped, it may be necessary to use a toothpick to hold it in place.
  4. Smoke at 225F, for 2-3 hours, or until the bacon is browned.
  To cook on the grill: Cook on a medium heat grill until the jalapeno is tender and the bacon is browned. Keep the lid covered while cooking.  
To cook in the oven: Bake the ABT’s in the oven, set at 425F, for 20-30 minutes or until the bacon is browned.
Everybody will scarf these and you will have zero left over. It may be necessary to sample a couple at home before you are bombarded.

Mini Fruit Pies

This weekend we went to my parent's house for dinner on Saturday. My dad made Green Chili and I am always responsible for dessert. When I asked my dad what I should make for dessert he said he was watching The Pioneer Woman make these on the Food Network that morning and that was what he wanted. Pretty easy, I figured I could manage. 

I cut a lot of corners with this recipe as I was busy making other stuff and doing housework. I didn't have time to make a home made pie dough, nor did I have time to make home made filling, nor did I have time to deep fat fry these puppies. I used a store bough pie crust, canned pie filling and stuck them in the oven so I could  move on to something else while they cooked. They still turned out yummy and were gobbled up so I don't feel too bad for taking the easy route.

This recipe yields 8 mini pies (4 circles out of each pie crust)
You will need:
1 pack of store bought pie crust (2 rounds)
Your favorite pie filling, whether you decide to make your own or buy the canned version; I used apple and cherry.
1 egg + a little water
1 cup powdered sugar
1 tsp vanilla extract
1-2 tsp milk


1. Lay out your pie crust and cut 4 same-sized circles out of each. 
2. Place cut circles on a parchment line baking sheet.
3. Scoop a couple spoon fulls of your pie filling near the center of each circle.
4. Make an egg wash (1 egg and a splash of water, whisked together).
5. Use your finger to coat the edges of the pie dough with egg wash.
6. Fold the dough over the filling and press to seal with your fingers.
7. Crimp edges with a fork.
8. Brush the top of the pies with egg wash and cut a small slit in the top to allow steam to escape.
9. Bake at 375 degrees for about 20 minutes or until golden brown.
10. Cool for about 30 minutes.
11. Make icing by whisking together powdered sugar, vanilla and milk. 
12. Drizzle icing over cooled pies.

These are quick and easy and something that everybody will love. Try switching up the fillings each time to make these a little different and interesting. They are yummy served cool- plus you can just pick them up with your hands and pop them in your mouth; but you can also stick one in the microwave and top with a little ice cream if you really wanna get fancy!
YUM!


Pumpkin Pie Crumble Bars

Pumpkin, again! Are you surprised?! If you are, then you don't know me very well. It's only going to get worse...I pinned tons of pumpkin recipes this weekend that I can't wait to try out! If you are a pumpkin hater- you might wanna follow a different blog until December rolls around ;-)

These are like pumpkin pie mixed with an oatmeal cookie. UHHHHH yeah you heard me- delicious. I love oatmeal cookies and I love pumpkin pie so how could this not be totally yummy? These are awesome, tasty, little pumpkiny, fall treats! Best topped with a little cool whip!

I found this recipe on this blog, which I now follow and may be a little obsessed with. This lady rocks.

Crust/Topping
1 1/4 cups all-purpose flour
1 1/4 cups quick oats (old fashioned works too)
1/2 tsp salt
1/2 tsp baking soda
1/2 cup granulated sugar
1/2 cup packed light-brown sugar
3/4 cup unsalted butter, melted
1 tsp vanilla extract

Pumpkin Pie Filling
1/4 cup granulated sugar
1/4 cup packed-light brown sugar
1 tsp cinnamon
1/2 tsp nutmeg
1/4 tsp ginger
1 pinch ground cloves
1/4 tsp salt
1 large egg
1 large egg yolk
1/2 tsp vanilla extract
1 1/4 cups canned pureed pumpkin
1/3 cup evaporated milk or half and half
Whipped cream and cinnamon, for serving (optional) 

Directions 
Preheat oven to 350 degrees. In a mixing bowl, whisk together flour, oats, salt and baking soda for 30 seconds. Add in 1/2 cup granulated sugar and 1/2 cup brown sugar an mix until no clumps remain. Combine melted butter and vanilla and add to mixture, then stir with a spoon until evenly moistened. Gently press half of the mixture into a greased 8 by 8-inch baking dish (a 9 by 9-inch baking dish would be great to, just reduce the baking time slightly as needed) and bake in preheated oven 15 minutes.

Meanwhile in a mixing bowl, whisk together 1/4 cup granulated sugar, 1/4 cup brown sugar, cinnamon, nutmeg, ginger, cloves and salt. Add in egg, egg yolk and vanilla and stir until blended. Mix in pumpkin then milk. Pour mixture over baked cookie portion and return to oven to bake 15 minutes, then remove from oven and sprinkle remaining cookie crumb mixture over top while breaking the crumb into small bits. Transfer oven rack closer to the top-center (not directly beneath but a few levels below) and return to oven to bake about 20 - 25 minutes longer until golden on top and center only jiggles slightly. Remove from oven and allow to cool 1 hour at room temperature, then transfer to refrigerator to cool 1 hour longer (or serve warm from the oven like a crumble with ice cream). Cut into squares and serve with sweetened whipped cream and a light dusting of cinnamon if desired. 
I lined my pan with foil; that way when I went to cut it into squares, it was easy to pop out of the pan.
Happy Baking!


Sunday, October 20, 2013

Lasagna

Lasagna is the perfect meal-gift. You cannot go wrong when you bring somebody a lasagna. It's warm, cheesy, gooey, fills your tummy....and I've never met anybody who doesn't like lasagna! I made this for a sick friend this weekend but this is my go-to recipe for lasagna anytime. Don't let the thought of making lasagna scare you; it can seem daunting- all the layering....I get it. I don't find this recipe to be difficult in the slightest! Top it with some fresh parm cheese and pair it with warm garlic bread...mmmm! Ideal for feeding a crowd too! Try it and you won't regret it!

Yields 10-12 servings
1 lb ground pork or ground beef
1/2 cup chopped onion
1 clove garlic, minced
1 (15oz) can tomato sauce
1 large can diced tomatoes
2 tsp dried basil
1 tsp salt
9 lasagna noodles
1 Tbsp oil
2 eggs
2 1/2cups small curd cottage cheese or whole milk ricotta
2/3 cup grated Parmesan or Ramano cheese
2 Tbsp dried parsley
1 package thinly sliced mozzarella or provolone cheese
1 package pepperoni

1. Cook meat, onion and garlic together until meat is browned; drain off fat.
2. Stir in undrained tomatoes, tomato sauce, basil and salt Cover and simmer 15 minutes, stirring often.
3. Meanwhile, cook noodles until tender in boiling salted water. Add oil so noodles do not stick together. 
4. Beat together eggs, ricotta, 1/2 cup of the parmesan/romano cheese, and parsley, Season with a pinch of salt and pepper.
5. Spoon 1/2 cup of tomato/meat mixture into the bottom of a 9x13" greased pan.
6. Layer 3 cooked, drained noodles.
7. Top with 9 rounds of thinly sliced mozzarella.
8. Spread with half the ricotta filling.
8. Layer pepperoni to cover.
9. Spoon 1/2 remaining tomato sauce/meat mixture over pepperoni.
10. Repeat noodles and subsequent layers. 
11. Sprinkle remaining Parmesan on top.
12. Cover tightly with foil and bake in a 350 degree oven for 35-40 minutes or until heated through and bubbly. Remove foil and bake for another 5-10 minutes or until top is browned.
13. Let stand about 10 minutes before serving.
 
This is also a great make ahead recipe. Keep it in your refrigerator until ready to cook; or cook ahead of time and freeze individual servings for quick and easy weeknight meals.


Wednesday, October 16, 2013

Pumpkin Chocolate Chip Cookies

Here comes the pumpkin! I bought my first round of pumpkin puree last night and the store at plan to put it to good use! Due to a minor set back I have made it dang near halfway through October without making every pumpkin dessert known to man and I'm not happy about it. I have some lost time to make up for so prepare yourselves for an overload!
 
I wish I was ambitious enough to roast and puree my own pumpkins but that is more than I have the patience for. Maybe one day.

These soft, sweet, chewy little gems are a perfect fall treat! They are bite sized and have the just the right pumpkin flavor. The original recipe is from a Taste Of Home magazine, and is made with bananas instead of pumpkin; it was an easy substitute to turn this cookie October-friendly.

Yields: about 2 dozen
 1/3 cup butter, softened 
1/2 cup sugar
1 egg
1/2 cup pumpkin puree
1/2 tsp vanilla extract
1 cup flour
1 tsp baking powder
1/4 tsp salt
1/8 tsp baking soda
1/4 tsp pumpkin pie spice
1/2 cup chocolate chips


In a smal bowl, cream butter and sugar until light and fluffy.
Beat in the egg, pumpkin and vanilla.
Combine the flour, baking powder, salt, baking soda, and pumpkin pie spice; gradually add to the creamed mixture and mix well.
Stir in chocolate chips.

Drop by rounded tablespoonfuls 2" apart onto a greased baking sheet.
Bake at 350 degrees for 9-11 minutes or until edges are lightly browned.
Cool on wire racks until ready to eat.
These are so yummy, it's hard not to eat more than a couple. I had to take some over to my parents so I didn't have to deal with the fact that I ate 2 dozen cookies by myself tomorrow morning.
Happy fall! Happy baking!


Monday, October 14, 2013

How To: Can Fresh Peaches

Have I ever mentioned that I'm obsessed with peaches ripe, juicy, peaches? I made it my priority to get up at 7:00 am every Saturday of the summer and go to the farmer's market to get a dozen peaches. They would last me just until the next Saturday, when I would wake up at 7:00 and repeat the process. The day of the last farmer's market was a sad one for me. No more waking up for these delicious beauties and getting to devour two a day, every day. Alas, I decided to splurge and spend the big bucks for a giant case of peaches at the last farmer's market of the season. Not really "big bucks", like 30 dollars for a giant box of peaches that is sure to last me at least a month of two! Problem is, these peaches are so ripe and juicy when you buy them, that unless you are some type of peach-eating-machine (I come close) then you will not be able to eat them all before they go bad. Waste of money, but more importantly, waste of the world's greatest fruit. People kept telling me I could freeze them, I know I can freeze them but I had a less than pleasant experience the last time I tried to freeze fresh peaches. The outcome was a brown, mushy, watery mess and it was depressing. I've never done any canning before, but decided that this was my best bet to preserve my peaches; so I did some research, went to the store, bought a bunch of mason jars and went to work!

You're going to start by peeling your peaches. If your peaches are perfectly ripe and at room temperature, this process should be fairly simple. Time consuming, but easy. If you are having trouble peeling your peaches, this site can help you!
* While you are peeling your peaches, run your jars and lids through a soap free cycle of the dishwasher; this will sanitize the jars as well as prepare them for the canning process by warming them up (you don't want to put hot syrup into a cold jar and then the cold jar into hot water as it may crack.*
This is about 20-25 (I didn't count) peeled and sliced peaches, that filled up 12 half pint sized jars.
 To accompany your peaches in the can, you need to make a simple syrup. This is just a combination of sugar dissolved in boiling water and can be as heavy or as light as you'd like. I chose to make a light syrup as these peaches were super sweet to begin with and didn't need a sweet, heavy syrup coating them.  
I mixed 1/2 cup sugar in 3 cups boiling water
Heat in a sauce pan until the sugar is dissolved. Remove from the heat until you're ready to fill your jars.

1. Take your hot jars out of the dishwasher and fill, one at a time with about 1/4 cup of simple syrup, then fill the rest of the way with peaches. *Be sure to leave room at the top of the jar as the food "expands" during the canning process*
2. Using a plastic spatula, push the peaches down and against the side of the jar, this is to remove air pockets which can lead to contamination in your canned food. 
3. Wipe the mouth of the jar with a clean towel before securing the lid (this prevents contamination too).
 4. Place closed jar in a large pot of simmering water. Be sure the jar is fully submerged.
*You can boil 5-7 jars at a time*
5. Cover the pot with a lid and raise the heat just enough to bring the water to a boil. Boil for 10 minutes.
6. Remove pot from heat and let stand for 5 additional minutes.
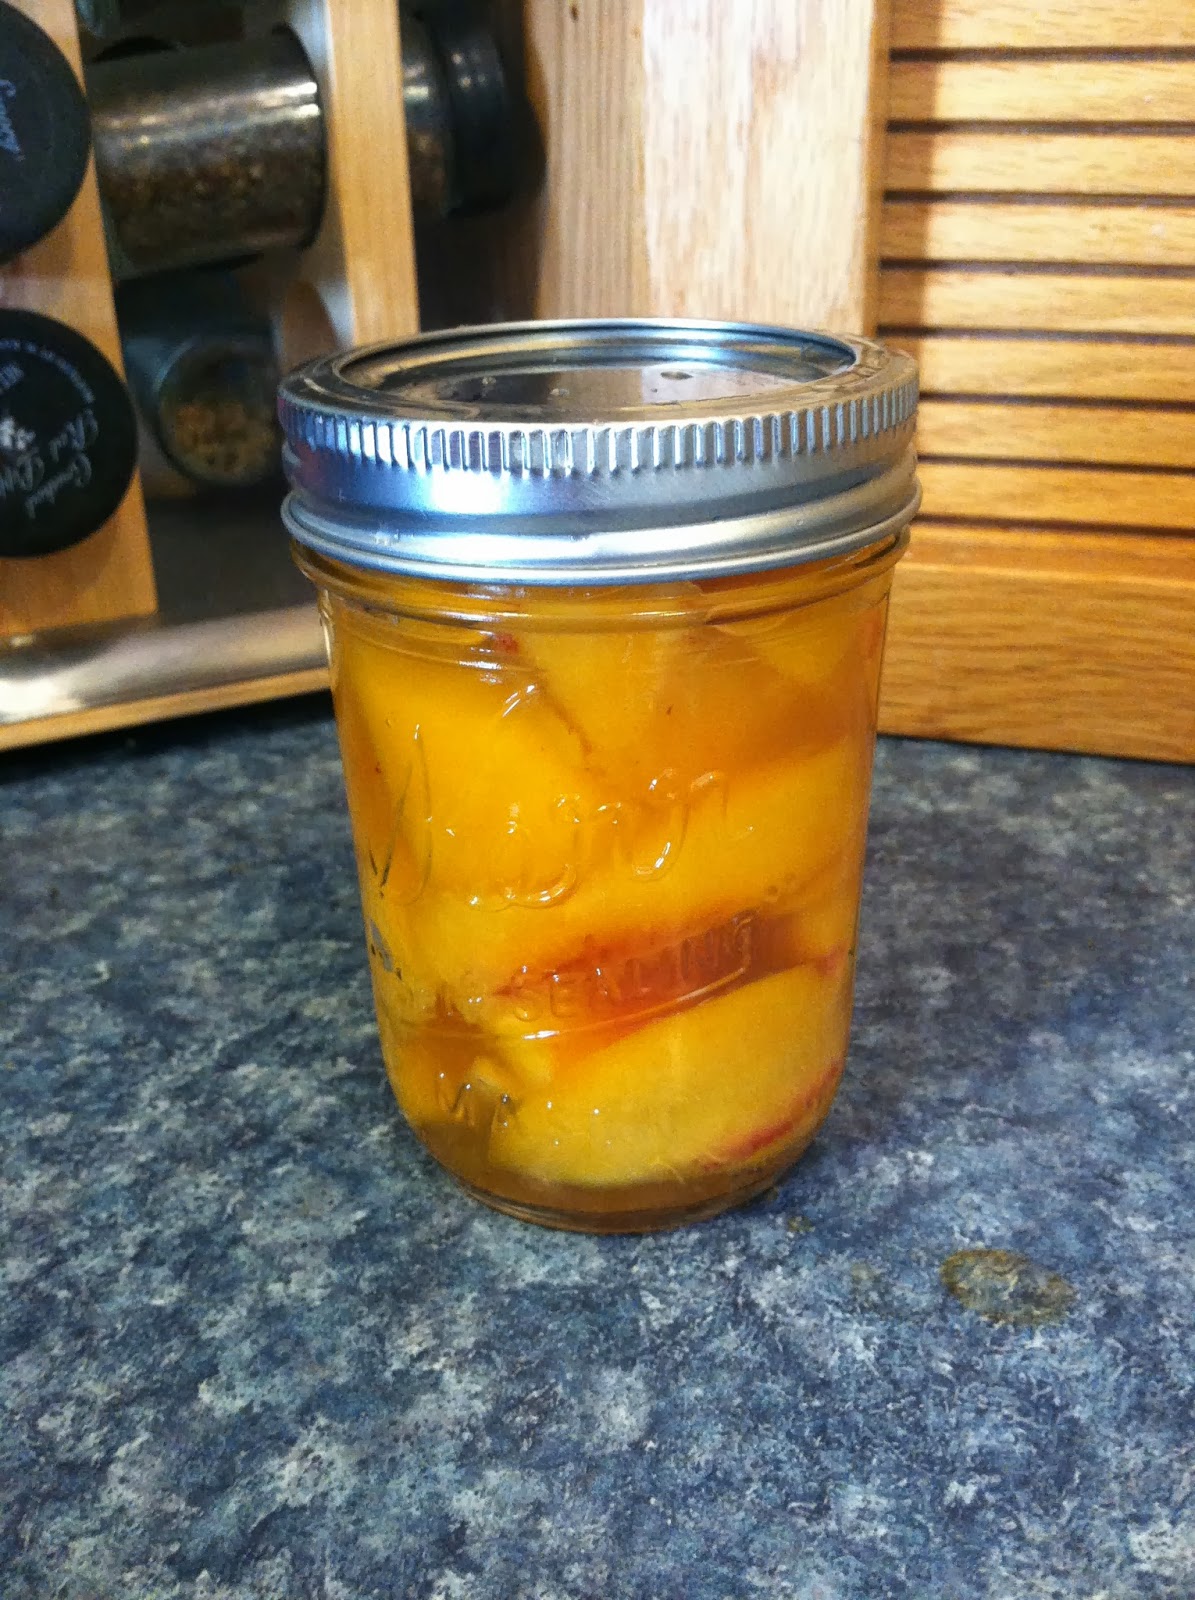
7. CAREFULLY remove hot jars from pot and cool on a wire rack or a towel on the counter for 12 hours.
8. To ensure the canning process was successful, lightly press on the center of the lids after the jars have completely cooled. If the lids flex, the canning process needs to be repeated as the jars are not sealed properly. 
9. Make sure to date your cans- if properly sealed, these can last up to a year in the pantry. Be sure to refrigerate after opening.

Now you can enjoy fresh peaches year round!! You can use these peaches just as you would fresh peaches bought from a store. Bake them in a pie, a cobbler, eat them over oatmeal, warm them up at pour them over vanilla ice cream.....okay now I am craving peaches!


Weeknight Desserts

I realize I've been slacking. I don't really have an excuse- I guess I am just extra busy? Although I don't know whats causing me to be busy? Maybe I'm just extra tired? Extra lazy? Well whatever the problem, I'm working on fixing it :-) These are recipes from a couple weeks ago (again), I promise I will get better about posting recipes before a week or more has passed! 
These are fun, simple, and relatively small desserts that are easy to make on a week night. I had all this stuff in my cupboards/refrigerator and needed to use it all before it went bad, so what did I do? I made up a couple little desserts, of course.
The first is strawberry shortcake! When you think of strawberry shortcake you don't have to think of store-bought, dry angel food cake and mushed strawberries. You can easily make it a little more elegant without more work! For this recipe, I used some refrigerated pop and eat biscuits, fresh strawberries and some whipped cream. It's the fresh strawberries mixed with the biscuit short cakes that elevates this dessert.
Start by rolling out your biscuits. You don't want to just bake the biscuits as that defeats the purpose and isn't very tasty. SO- use a rolling pin to roll out your dough until it is about 1/4" in thickness. Use a round cookie cutter to cut out small circles (depending on how big your circle cutter is, you can get about 3 circles per one biscuit). Place each round on a greased cookie sheet and poke all over the top with a fork. This is very important, this ensures that the dough will not puff up too much while in the oven, keeping the texture more shortcake-like rather than biscuit-like. Bake according to package directions and sprinkle with cinnamon sugar when they are hot out of the oven. Let your short cakes cool while you quarter fresh strawberries and mix with a sprinkle of sugar. 
Assemble however you like, I prefer mine to look pretty, so I layered two shortcakes, strawberries and cream. You can just pile yours in a bowl, or mush it up, or whatever you like to do with your strawberries and shortcake; none of my business ;-)


I bought a case of peaches at the last farmer's market this summer. A CASE! I wanted enough peaches to last me through the fall and maybe even part of the winter because the ones you buy at the store just do not compare, at all. 
Again for this recipe, I used refrigerated biscuit dough (just the other half the package I used for the strawberry shortcake). Again, begin by rolling out biscuit dough to about 1/4" thickness. Use a circle cutter to cut circles out of the dough (these will be bigger circles as they need to be big enough to fill a muffin pan). Place the circles in a greased muffin tin, and poke with a fork. Again: this will prevent the dough from puffing up too much while in the oven. Cook the empty shells about 5-7 minutes until they start to brown. We want to give the shells a little bit of a head start so that they cook all the way through when topped with the peaches and don't come out of the oven mushy and undercooked. 
While the shells are taking a quick trip in the oven, start peeling and slicing your peaches! To make 5 of these little guys I used 2 medium sized peaches and ended up with some leftover. Dice into small chunks, add 1 Tbsp of sugar, 1 Tbsp of flour, 1/4 tsp of cinnamon and a dash of nutmeg. When the shells come out of the oven, top with a spoonful of peach filling mixture and put back into the oven for about 10-15 more minutes or until the crust is golden brown and cooked through, and the peaches are warm and tender. Pull these cute little treats out of the oven and cool on a wire rack. Pop them out of the muffin tin and top with caramel sauce for a little extra yummy-ness!
These are easy, fun, yummy and perfect for a quick, weeknight dessert :-) Plus, you can pick them up and eat them with your hands! What's better than a pie you can eat with your hands?! YUM.


Monday, October 7, 2013

Salmon Veggie Packets

The last couple weeks have been CRAZY around here! Between visiting Denver, our short trip to Nebraska last weekend and the absolutely nasty storm that hit here this weekend I haven't had a second to myself! Here I am, three weeks later on a Monday afternoon finally sitting down to post this recipe I made like literally 3 weeks ago. Time flies when you're having fun, right!? Sheesh!

This recipe is pure goodness! Salmon, tons of veggies, a yummy teriyaki sauce, steamed to perfection! PLUS, its all protein and veggies- so it's awesome for you! Something you can enjoying eating and not feel guilty about it!

Serves: 2
2 (4-6 oz.) salmon steaks
various vegetables chopped into similar, bite sized pieces
(I used broccoli, cauliflower, snow peas, acorn squash, carrots and baby red potatoes) 
Teriyake glaze (see recipe below)
2 Tbsp butter


1. Lay out two pieces of foil and place one piece of salmon in the middle of each.
2. Surround the salmon with chopped veggies.
3. Pour 1/2 of the teriyake sauce over each.
4. Cut butter into small pieces and dot over the top of the salmon and veggies.
4. Seal foil packets (make sure you leave a small slit in each side for steam to escape)
5. Place on a baking sheet and bake in a 350 degree oven  for 20-30 minutes or until salmon is cooked through and veggies are fork tender.


Teriyake Glaze
1/4 cup store bought teriyaki glaze (found in the Asian aisle of the grocery store)
2 Tbsp soy sauce
2 Tbsp brown sugar
1/2 tsp ground ginger
1/2 tsp minced garlic

Scott opened up his "packet" and immediately said, "whoa, that's a lot of vegetables" hahah he is a meat and potatoes kinda guy so this wasn't his favorite dinner. For me, its the perfect, tasty, light dinner!