Pages

Showing posts with label fruit. Show all posts

Monday, October 21, 2013

Mini Fruit Pies

This weekend we went to my parent's house for dinner on Saturday. My dad made Green Chili and I am always responsible for dessert. When I asked my dad what I should make for dessert he said he was watching The Pioneer Woman make these on the Food Network that morning and that was what he wanted. Pretty easy, I figured I could manage. 

I cut a lot of corners with this recipe as I was busy making other stuff and doing housework. I didn't have time to make a home made pie dough, nor did I have time to make home made filling, nor did I have time to deep fat fry these puppies. I used a store bough pie crust, canned pie filling and stuck them in the oven so I could  move on to something else while they cooked. They still turned out yummy and were gobbled up so I don't feel too bad for taking the easy route.

This recipe yields 8 mini pies (4 circles out of each pie crust)
You will need:
1 pack of store bought pie crust (2 rounds)
Your favorite pie filling, whether you decide to make your own or buy the canned version; I used apple and cherry.
1 egg + a little water
1 cup powdered sugar
1 tsp vanilla extract
1-2 tsp milk


1. Lay out your pie crust and cut 4 same-sized circles out of each. 
2. Place cut circles on a parchment line baking sheet.
3. Scoop a couple spoon fulls of your pie filling near the center of each circle.
4. Make an egg wash (1 egg and a splash of water, whisked together).
5. Use your finger to coat the edges of the pie dough with egg wash.
6. Fold the dough over the filling and press to seal with your fingers.
7. Crimp edges with a fork.
8. Brush the top of the pies with egg wash and cut a small slit in the top to allow steam to escape.
9. Bake at 375 degrees for about 20 minutes or until golden brown.
10. Cool for about 30 minutes.
11. Make icing by whisking together powdered sugar, vanilla and milk. 
12. Drizzle icing over cooled pies.

These are quick and easy and something that everybody will love. Try switching up the fillings each time to make these a little different and interesting. They are yummy served cool- plus you can just pick them up with your hands and pop them in your mouth; but you can also stick one in the microwave and top with a little ice cream if you really wanna get fancy!
YUM!


Monday, October 14, 2013

How To: Can Fresh Peaches

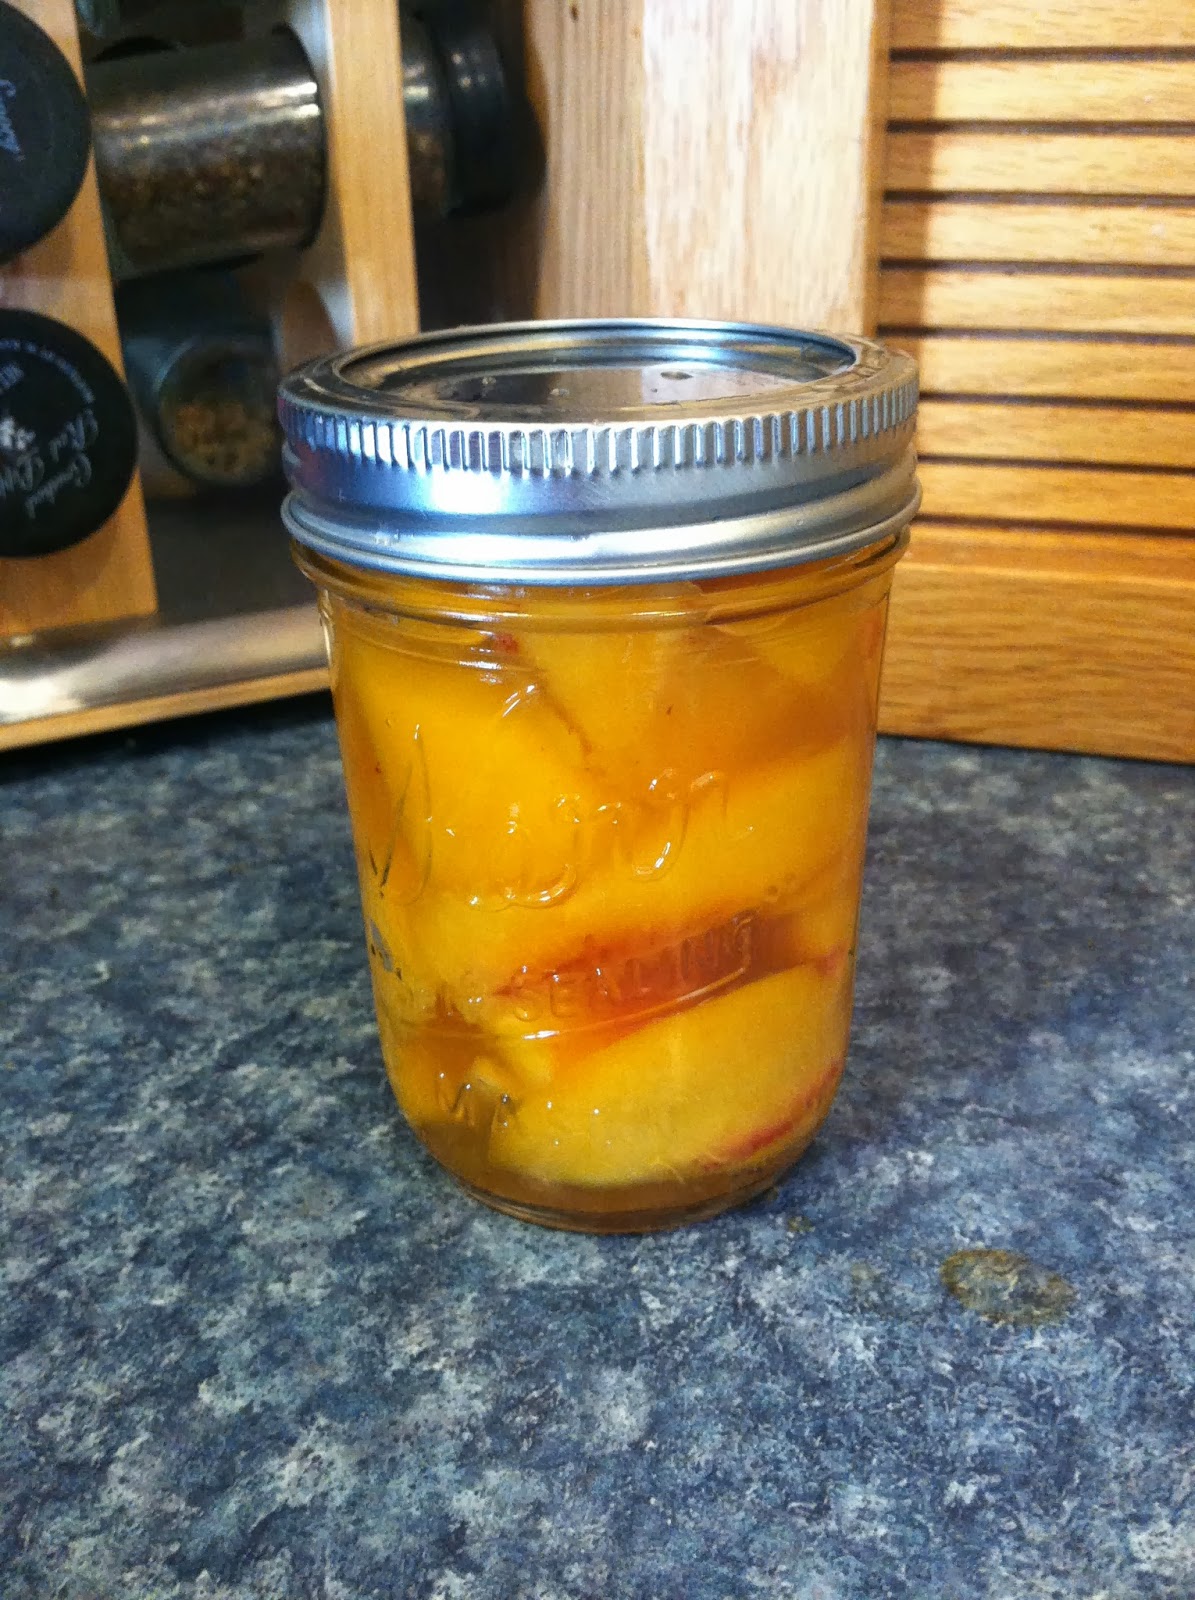
Have I ever mentioned that I'm obsessed with peaches ripe, juicy, peaches? I made it my priority to get up at 7:00 am every Saturday of the summer and go to the farmer's market to get a dozen peaches. They would last me just until the next Saturday, when I would wake up at 7:00 and repeat the process. The day of the last farmer's market was a sad one for me. No more waking up for these delicious beauties and getting to devour two a day, every day. Alas, I decided to splurge and spend the big bucks for a giant case of peaches at the last farmer's market of the season. Not really "big bucks", like 30 dollars for a giant box of peaches that is sure to last me at least a month of two! Problem is, these peaches are so ripe and juicy when you buy them, that unless you are some type of peach-eating-machine (I come close) then you will not be able to eat them all before they go bad. Waste of money, but more importantly, waste of the world's greatest fruit. People kept telling me I could freeze them, I know I can freeze them but I had a less than pleasant experience the last time I tried to freeze fresh peaches. The outcome was a brown, mushy, watery mess and it was depressing. I've never done any canning before, but decided that this was my best bet to preserve my peaches; so I did some research, went to the store, bought a bunch of mason jars and went to work!

You're going to start by peeling your peaches. If your peaches are perfectly ripe and at room temperature, this process should be fairly simple. Time consuming, but easy. If you are having trouble peeling your peaches, this site can help you!
* While you are peeling your peaches, run your jars and lids through a soap free cycle of the dishwasher; this will sanitize the jars as well as prepare them for the canning process by warming them up (you don't want to put hot syrup into a cold jar and then the cold jar into hot water as it may crack.*
This is about 20-25 (I didn't count) peeled and sliced peaches, that filled up 12 half pint sized jars.
 To accompany your peaches in the can, you need to make a simple syrup. This is just a combination of sugar dissolved in boiling water and can be as heavy or as light as you'd like. I chose to make a light syrup as these peaches were super sweet to begin with and didn't need a sweet, heavy syrup coating them.  
I mixed 1/2 cup sugar in 3 cups boiling water
Heat in a sauce pan until the sugar is dissolved. Remove from the heat until you're ready to fill your jars.

1. Take your hot jars out of the dishwasher and fill, one at a time with about 1/4 cup of simple syrup, then fill the rest of the way with peaches. *Be sure to leave room at the top of the jar as the food "expands" during the canning process*
2. Using a plastic spatula, push the peaches down and against the side of the jar, this is to remove air pockets which can lead to contamination in your canned food. 
3. Wipe the mouth of the jar with a clean towel before securing the lid (this prevents contamination too).
 4. Place closed jar in a large pot of simmering water. Be sure the jar is fully submerged.
*You can boil 5-7 jars at a time*
5. Cover the pot with a lid and raise the heat just enough to bring the water to a boil. Boil for 10 minutes.
6. Remove pot from heat and let stand for 5 additional minutes.
7. CAREFULLY remove hot jars from pot and cool on a wire rack or a towel on the counter for 12 hours.
8. To ensure the canning process was successful, lightly press on the center of the lids after the jars have completely cooled. If the lids flex, the canning process needs to be repeated as the jars are not sealed properly. 
9. Make sure to date your cans- if properly sealed, these can last up to a year in the pantry. Be sure to refrigerate after opening.

Now you can enjoy fresh peaches year round!! You can use these peaches just as you would fresh peaches bought from a store. Bake them in a pie, a cobbler, eat them over oatmeal, warm them up at pour them over vanilla ice cream.....okay now I am craving peaches!


Weeknight Desserts

I realize I've been slacking. I don't really have an excuse- I guess I am just extra busy? Although I don't know whats causing me to be busy? Maybe I'm just extra tired? Extra lazy? Well whatever the problem, I'm working on fixing it :-) These are recipes from a couple weeks ago (again), I promise I will get better about posting recipes before a week or more has passed! 
These are fun, simple, and relatively small desserts that are easy to make on a week night. I had all this stuff in my cupboards/refrigerator and needed to use it all before it went bad, so what did I do? I made up a couple little desserts, of course.
The first is strawberry shortcake! When you think of strawberry shortcake you don't have to think of store-bought, dry angel food cake and mushed strawberries. You can easily make it a little more elegant without more work! For this recipe, I used some refrigerated pop and eat biscuits, fresh strawberries and some whipped cream. It's the fresh strawberries mixed with the biscuit short cakes that elevates this dessert.
Start by rolling out your biscuits. You don't want to just bake the biscuits as that defeats the purpose and isn't very tasty. SO- use a rolling pin to roll out your dough until it is about 1/4" in thickness. Use a round cookie cutter to cut out small circles (depending on how big your circle cutter is, you can get about 3 circles per one biscuit). Place each round on a greased cookie sheet and poke all over the top with a fork. This is very important, this ensures that the dough will not puff up too much while in the oven, keeping the texture more shortcake-like rather than biscuit-like. Bake according to package directions and sprinkle with cinnamon sugar when they are hot out of the oven. Let your short cakes cool while you quarter fresh strawberries and mix with a sprinkle of sugar. 
Assemble however you like, I prefer mine to look pretty, so I layered two shortcakes, strawberries and cream. You can just pile yours in a bowl, or mush it up, or whatever you like to do with your strawberries and shortcake; none of my business ;-)


I bought a case of peaches at the last farmer's market this summer. A CASE! I wanted enough peaches to last me through the fall and maybe even part of the winter because the ones you buy at the store just do not compare, at all. 
Again for this recipe, I used refrigerated biscuit dough (just the other half the package I used for the strawberry shortcake). Again, begin by rolling out biscuit dough to about 1/4" thickness. Use a circle cutter to cut circles out of the dough (these will be bigger circles as they need to be big enough to fill a muffin pan). Place the circles in a greased muffin tin, and poke with a fork. Again: this will prevent the dough from puffing up too much while in the oven. Cook the empty shells about 5-7 minutes until they start to brown. We want to give the shells a little bit of a head start so that they cook all the way through when topped with the peaches and don't come out of the oven mushy and undercooked. 
While the shells are taking a quick trip in the oven, start peeling and slicing your peaches! To make 5 of these little guys I used 2 medium sized peaches and ended up with some leftover. Dice into small chunks, add 1 Tbsp of sugar, 1 Tbsp of flour, 1/4 tsp of cinnamon and a dash of nutmeg. When the shells come out of the oven, top with a spoonful of peach filling mixture and put back into the oven for about 10-15 more minutes or until the crust is golden brown and cooked through, and the peaches are warm and tender. Pull these cute little treats out of the oven and cool on a wire rack. Pop them out of the muffin tin and top with caramel sauce for a little extra yummy-ness!
These are easy, fun, yummy and perfect for a quick, weeknight dessert :-) Plus, you can pick them up and eat them with your hands! What's better than a pie you can eat with your hands?! YUM.


Monday, September 23, 2013

Lunch Time Favorites


Lunch used to be my least favorite meal. Lunch foods aren't my favorite. I never felt like making anything; I would usually just end up warming up left overs or ordering out. Sometimes I would even fore-go lunch all together because I disliked it so much. I know, its weird to dislike lunch but I just had a hard time with it. Since I've started working out mid-morning, lunch has become and incredibly important meal to me! I need something to boost my energy to get me though the rest of the day. No more skipping this meal or I would end up face flat in my bed while my 4 year old terrorizes his sister and the dogs; not good! I went to the store and let my mind wander, looking for different things I thought I could eat for lunch (this does not include freezer meals). I came across some whole grain pita pockets and that's all she wrote; those were my inspiration! I make a couple different sandwiches in those pita pockets and I also eat them as a side to salads. Since I've made a point to eat a nutritious lunch, I have noticed that I have a lot more energy in the afternoons and feel refreshed after my workout instead of drained.

Avocado Chicken Salad

I'm sorry, but mayo is gross. Actually, I'm not sorry. I have never been a fan and I never will be. Plus, its yucky for you. I'm not going to work out and then go eat mayo- gross. Therefore I decided to make chicken salad using avocado instead! It's creamy, so it works in the chicken salad just like mayo, its the perfect, healthy substitute!
Serves: 2
2 whole grain pita pockets 
1/2 cup spinach
1 can chicken breast meat or one cooked chicken breast, shredded.
1/2 to 1 whole avocado
1 tsp spicy dijon mustard
1/2 tsp lime juice (pickle juice works well here too)
 1/4 cup green grapes, halved or quartered
1/8-1/4 cup dried cranberries, chopped
1/8-1/4 cup slivered almonds (or your favorite nut)
1/2 tsp fresh dill, chopped
salt and pepper to taste

Empty the can of chicken into a bowl, along with the avocado. Mix together until the avocado is completely mashed and combined with the chicken. Add the dijon mustard, grapes, cranberries, almonds, dill, salt and pepper. Mix until combined. Stuff in pita pocket with fresh spinach.

 Spinach Salad with Chicken
I don't eat salads. I don't like lettuce and I can never find a dressing that I like. Have you all noticed I'm a little bit of a picky eater? I wish I could eat salad for every meal....ah I'd be so skinny! Unfortunately for me my sweet tooth is too large and in charge to allow that to happen. I am trying really hard to get back into shape after having Elliette and I've gotta eat better if that's going to happen. SO, I decided to try to make myself a salad today. I went with spinach as its much better for you and I prefer the taste much more over than of regular lettuce. I topped it with cooked chicken, some bacon bits, chopped broccoli and cauliflower, feta cheese and a homemade dressing. Mine was more chicken than anything else because my diet seriously lacks protein; but you can cut back, add on, or substitute whatever you like on your salad!

Serves: 1
1 cup spinach
1 boneless, skinless chicken breast
1/4 cup chopped broccoli and cauliflower
2 pieces bacon, chopped
1 Tbsp feta cheese
Dressing (see recipe below)

I cooked the chicken up in some of the dressing to give it flavor, then just tossed all the ingredients together. I don't really need to give you directions on how to make a salad, do I?! ;-)

Dressing
1 Tbsp honey mustard
2 Tbsp soy sauce
1 Tbsp honey
1 tsp apple cider vinegar
2 Tbsp canola oil
1/2 tsp minced garlic
1/4 tsp ground ginger
1/2 tsp parsley
1/4 tsp rosemary

Whisk all ingredients together until well combined, toss with your favorite greens.
*This is also a delicious marinade!*

Fruit and Oatmeal Smoothie
   This is cool, tart and refreshing and the perfect lunch pairing to give you that extra boost!

Serves: 1
1 & 1/2 cups chopped fruit
1/4 cup nonfat milk
1/4 cup orange juice
1/2 cup whole grain oats
handful of ice cubes

Add everything into a blender and blend until smooth.

You can use whatever fruits you want! I had some left over "fruit salad" that I had diced up this past weekend that needed to be used. Mine is a combination of raspberries, blueberries, strawberries and peaches. It was really delicious!

If you are in a lunch time rut, I hope you try these recipes!

Friday, September 6, 2013

Peach Crisp


Peaches are my all-time favorite fruit. Seriously, I'm obsessed. When peaches are in season I eat at least one a day. I go to the Farmer's Market every Saturday morning for fresh Colorado or Utah peaches that are to die for, they are sooo ripe and juicy. Sometimes they start to ripen faster than I can eat then (which is fast) and I am forced to peel them, cut them up and make them into something yummy before they go bad. This time I chose peach crisp. Basically a crisp is just sweet fruit with a sugary oat streusel baked on top. Fruit crisps are delicious, especially when made with ripe, sweet, juicy, fresh fruit. Lots of crisp recipes call for canned peaches...which is okay....but once you make one with fresh, ripe peaches I promise you will not go back! This is originally a recipe for strawberry rhubarb crisp from cooks.com, but I just adapted it by using peaches instead. Also, there is no need for me to make a whole 9x13 pan full...so it's easy to make only half of this recipe if you want :-)

8 cups sliced peaches
1 cup sugar
1 1/3 cup flour
1/2 tsp. cinnamon
1 cup browpn sugar
1 cup old fashioned rolled oats
1/4 tsp. nutmeg
1/2 cup butter (melted & cooled)

1. In a large bowl, combine fruit, sugar, 1/3 cup of the flour and cinnamon. Transfer into a greased 9x13 baking dish.
2. In another bowl, combine remaining 1 cup of flour with brown sugar, oats and nutmeg. Add butter and blend well with a fork to create the streusel.
3. Sprinkle streusel over fruit mixture and bake at 350 degrees for 35-40 minutes or until golden brown and bubbly.
This is best served warm with a big scoop of vanilla ice cream. Such a delicious, fresh, summer dessert. I make this dessert often and it's always a hit!
Enjoy!